
I used the Move tool again to reposition ourselves further down in the grass. It took careful work of zooming in/out and changing eraser tool size to properly remove all of the white. I found I had to get to the 1 pixel size to really get results I wanted. Changing the opacity of the layer allowed me at times to see what I would have before erasing. I used the Ctrl Z shortcut to go back when I erased too much. Experience gets one to use the eraser tool in short bursts and not trying to erase too much at once. I saved time this way.

At some point I felt like I was done to the best of my ability. This is always a judgement call because I feel like more time spent could produce a better image. I think the law of diminishings returns comes in here.
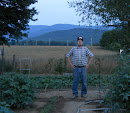
Thinking of the composition rules of leading one's eye in a photo got me to crop the image to position the elements of the photo better. In the screen shot below you can see where I am ready to accept the cropped dimension.

No comments:
Post a Comment